
Contents
Worcester – The Faithful City
The Second phase Civil War had ended with the execution of King Charles I in 1649 and the establishment of the Commonwealth and confirmation of Oliver Cromwell as the main power in the land.
The young Charles Stuart however, still claimed the throne. Perusing this, he landed in Scotland in June 1650 and, in January 1651, was proclaimed King in direct opposition to the English Parliament and the Third Civil War followed – Charles invaded England heading south hoping to ignite a general uprising. When he was denied entry to Shrewsbury, he headed for Worcester which was known to harbour Royalist sympathies, known in fact as the Faithful City, due to its earlier role in the Civil War. In 1642 the Royalists had won the first skirmish of the Civil War in the battle of the nearby Powick Bridge. Furthermore, the city had had defended itself strongly against the Parliamentarians before eventually falling in the Siege of Worcester in 1646.
As of August 1651, Worcester was garrisoned by a 500 strong Parliamentary garrison who, as a matter of strategy, offered minimal resistance to the Royalist army, thereby avoiding a siege which they felt would run counter to their interests. The Royalists entered the city on 23 August 1651 and immediately started the process of re-fortification of key points, including a substantial earthwork bastion, Fort Royal which commanded the high ground overlooking Sidbury Gate. Their HQ was the Commandery, near overlooked by Fort Royal itself. This building still exists and is now a museum to the Civil War. Its name predates the battle, going back to its earlier life as a Monastery hospital.

The Royalist HQ was the Commandery, near Sidbury Gate, overlooked by Fort Royal.
Within five days of the Royalists securing Worcester, Parliamentary forces converged on the city. By 28 August 1651 the eastern approaches had been blockaded, but an all-out attack was delayed until Parliamentary troops were in a position to secure the Western side – Cromwell did not want the Royalists simply retreating into Wales. By 3 September 1651 he was ready to begin his assault and the Battle of Worcester commenced.
The Battlefield
This map gives an overview of the action, the city walls are the purple lines enclosing the shaded area. Cromwell had forces to the South-West of the city and at Red Hill to the East. The Royalist had troops close to the city, just over the River Severn in the area known as St John’s and also Fort Royal, to the East (blue star, circled below) and close to The Commandery. Charles himself was positioned in the tower of Worcester Cathedral, close to the River Severn.

Battle map by John Fawkes, BritishBattles.com.
The River Teme and The Southern Battle
At 5am on 3 September 1651, the Parliamentarians left Upton where they were stationed and started the ten-mile march to Worcester. Around midday, Royalist troops, aware of this movement, confronted them unsuccessfully at Powick, south of the city, without success and the church tower still bears marks of the conflict. The Royalists then retreated to Powick Bridge (the oval on the left of the map above) about a mile away where they could use the River Teme to aid their defence.
This is where the Monarch’s Way starts and there are several things to note. One is that Powick Bridge, is a magnificent structure, much of it dating to 1477 and retaining a distinctly medieval air about it. Another is the various plaques and notices. For one, there is an information board about the battle, another marks the start of the Monarch’s Way and a third is a commemoration of the Scottish lives lost on the Battle.

Powick Bridge – parts of it were deliberately smashed up by the Royalist to make it easier to defend.
Gradually moving forward from Powick Church, around 1:00pm the Roundheads arrived at but failed to breach Powick bridge. The key to the battle at this stage is that the Royalists still held the ground immediately south-west of the city and were protected by the Teme and the Severn. Cromwell famously overcame this obstacle by use of two pontoon bridges at the confluence of the two rivers, one crossing each river – and the Monarch’s Way takes you to the point where this happened, another information board is there to tell the story.

It was a fierce battle. It is hard to believe that 370 years ago this now peaceful spot was the centre of vicious fighting in what is one of the last battles ever fought on English soil.
This is me standing by an information board opposite the confluence.
Fort Royal and the City Battle
While the forces were engaged South of the city, Charles, from his vantage point on top of Worcester cathedral’s tower, realised that an opportunity existed to attack the now-exposed eastern flank of the Parliamentary army. As the defenders on the Western side of the city retreated in good order into the city, Charles ordered two sorties to attack the Parliamentary forces east of the city. The north-eastern sortie through St. Martin’s Gate was commanded by the Duke of Hamilton and attacked the Parliamentary lines at Perry Wood. The south-eastern one, through Sidbury Gate, was led by Charles II and attacked Red Hill. Cromwell, seeing the difficulty that his east flank was under, rushed back over the Severn pontoon bridge with three brigades of troops to reinforce the flank.

For an hour, the Parliamentarians retreated before the unexpected attack but they were too numerous and experienced to be defeated by such a move. Following their reinforcement by Cromwell’s three brigades, they reversed the situation and drove the Royalists back toward the city. The Royalist retreat turned into a rout in which Parliamentarian and Royalist forces intermingled and skirmished up to and into the city. The Royalist position became untenable when the Essex militia stormed and captured Fort Royal and turned the Royalist guns to fire on Worcester.
Meanwhile, the Royalist cavalry under the command of David Leslie that was gathered on Pitchcroft Meadow on the northern side of the city, did not receive orders to aid the sorties and Leslie chose not to do so under his own initiative. The non-participation of these troops remains something of an enigma and did the Royalist Army no favours.

Fort Royal Park today, overlooking the City

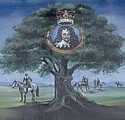
Returning to the city, legend has it that Charles II used an overturned ammunition cart to climb over Sudbury Gate, removed his armour and found a fresh horse; he attempted to rally his troops, but was unable to do so. A desperate Royalist cavalry charge down Sidbury Street and High Street, led by the Earl of Cleveland and Major Careless amongst others, allowed King Charles to escape along Friar Street to his lodgings and then leave by St. Martin’s Gate to the North and meet with some sixty of his officers. The flight was on.
This modern statue shows Charles in the act of escape
Conclusion of the Battle
Charles retreat with most of the offices effectively meant the battle was decided, but some of the Royalist soldiers By 10:00pm however the last of their number had surrendered. It was the last significant battle of the English Civil War and prompted Cromwell to say ‘It is, for aught I know, a crowning mercy’. To prevent Worcester rising again to support the King, he destroyed the City Walls. A Plaque commemorating the battle in general and Cromwell’s words in particular was erected near the Commandery by the Cromwell Association and Worcester City Council with the aid of public subscription in 1993.
Casualties and prisoners
We should never forget the victims of war.
About 3,000 of Charles’s men were killed during the battle, and a further 10,000 were taken prisoner at Worcester or soon afterwards; the Cathedral served as a short-term prisoner of war camp. Most English prisoners were conscripted into the New Model Army and sent to Ireland. Around 8,000 Scottish prisoners were deported to New England, Bermuda, and the West Indies to work for landowners as indentured labourers; others were sent to work on fen drainage or were taken to London. Many died from disease and starvation at Tothill Fields and other makeshift prison camps.
Parliamentary casualties numbered in the low hundreds.
Suggested walk
See this page